Raylib on iOS: Building a C++ Game with Xcode
• tech
When I started working on an iOS version of Kasino, my card game written in C++ with raylib, I thought getting it onto an iPhone would mostly be a CMake problem.
The game already ran on other platforms from the same C++ codebase. On desktop, CMake downloads raylib and builds the game, so I tried pointing it at the iPhone SDK and generating an Xcode project. Configuration failed while looking for desktop OpenGL libraries.
What I eventually ended up with was a slightly different setup: I keep my normal CMake build for desktop, but iOS uses a dedicated raylib-iOS Xcode project. My C++ game code is injected into that project, and a small script handles the iOS-specific changes.
I also ran into another problem along the way: the version of the iOS backend I was using still relied on Apple's older application lifecycle, while Xcode 27 expected UIScene.
After getting all of that working in Kasino, I stripped the setup down into a small example project:
GitHub: nesmy/raylib-ios-example
The example now builds from scratch, runs in the iOS Simulator, and I've also tested the same setup on a physical iPhone.
Here is the setup I used, including the lifecycle patch and the scripts that prepare the Xcode project.
The Starting Point
My normal raylib projects use CMake.
A simplified version looks like this:
cmake_minimum_required(VERSION 3.20)

project(raylib_ios_example
    VERSION 1.0.0
    LANGUAGES C CXX
)

set(CMAKE_CXX_STANDARD 17)
set(CMAKE_CXX_STANDARD_REQUIRED ON)

include(FetchContent)

FetchContent_Declare(
    raylib
    GIT_REPOSITORY https://github.com/raysan5/raylib.git
    GIT_TAG 5.5
)

FetchContent_MakeAvailable(raylib)

add_executable(raylib_ios_example
    src/main.cpp
)

target_link_libraries(raylib_ios_example
    PRIVATE
        raylib
)
CMake downloads raylib 5.5, compiles my C++ code and links against raylib.
On macOS I can just run:
cmake -S . -B build
cmake --build build
So naturally, my first attempt was to make CMake target iOS instead.
My First Attempt: Generate an iOS Xcode Project
CMake already knows about iOS, and it can generate Xcode projects, so I tried something along these lines:
cmake -S . -B build-ios \
    -G Xcode \
    -DCMAKE_SYSTEM_NAME=iOS \
    -DCMAKE_OSX_SYSROOT=iphoneos \
    -DCMAKE_OSX_ARCHITECTURES=arm64 \
    -DCMAKE_OSX_DEPLOYMENT_TARGET=15.0
CMake itself recognized the iOS target.
During configuration I was still getting:
PLATFORM=PLATFORM_DESKTOP
GRAPHICS=GRAPHICS_API_OPENGL_33
It also started pulling in the Cocoa/OpenGL desktop path.
Eventually configuration failed because it was looking for desktop OpenGL libraries while supposedly building an iOS application.
So simply setting:
CMAKE_SYSTEM_NAME=iOS
wasn't enough to turn the normal raylib 5.5 CMake build into the iOS backend I needed.
I switched to the iOS-specific fork rather than extending that desktop configuration.
Using raylib-iOS
The setup that ended up working for me was the release/5.5 branch of ghera/raylib-iOS.
Instead of trying to generate the entire iOS application from my normal CMake project, I use the Xcode project provided by raylib-iOS:
projects/Xcode26/raylib.xcodeproj
For my example project, I keep it under a generated Targets directory:
raylib-ios-example/
├── ios/
├── scripts/
├── src/
│   └── main.cpp
└── Targets/
    └── raylib-ios/
Targets/ is ignored by Git because everything inside it can be recreated.
The first part of my build script is basically:
RAYLIB_IOS_DIR="$ROOT_DIR/Targets/raylib-ios"

if [ ! -d "$RAYLIB_IOS_DIR" ]; then
    mkdir -p "$ROOT_DIR/Targets"

    git clone \
        --depth 1 \
        --branch release/5.5 \
        https://github.com/ghera/raylib-iOS.git \
        "$RAYLIB_IOS_DIR"
fi
This fork supplies the native iOS project. My game source stays in its own repository.
Letting the iOS Backend Drive the Game Loop
A basic raylib game normally looks something like this:
int main()
{
    InitWindow(800, 600, "raylib");

    SetTargetFPS(60);

    while (!WindowShouldClose())
    {
        BeginDrawing();

        ClearBackground(BLACK);

        EndDrawing();
    }

    CloseWindow();

    return 0;
}
The program owns the main loop.
The iOS backend works differently because the application lifecycle is controlled by iOS.
The raylib-iOS project expects the game to expose callbacks that the native side can call:
void ios_ready();
void ios_update(bool viewSizeChanged);
void ios_destroy();
I wanted to keep the actual game code as close as possible between desktop and iOS, so I split the example into three functions:
static void Ready()
{
#if defined(PLATFORM_IOS)
    SetConfigFlags(FLAG_FULLSCREEN_MODE);
    InitWindow(0, 0, "raylib iOS Example");
#else
    InitWindow(390, 844, "raylib iOS Example");
#endif

    SetTargetFPS(60);
}

static void Update(bool viewSizeChanged)
{
    (void)viewSizeChanged;

    BeginDrawing();

    ClearBackground(Color{25, 94, 70, 255});

    const char* title = "raylib on iOS";
    const int fontSize = 32;

    const int textWidth = MeasureText(title, fontSize);

    DrawText(
        title,
        (GetScreenWidth() - textWidth) / 2,
        GetScreenHeight() / 2 - fontSize / 2,
        fontSize,
        RAYWHITE
    );

    EndDrawing();
}

static void Destroy()
{
    CloseWindow();
}
Then I use those same functions differently depending on the platform.
For a normal desktop build:
int main()
{
    Ready();

    while (!WindowShouldClose())
    {
        Update(false);
    }

    Destroy();

    return 0;
}
For iOS:
extern "C"
{
    void ios_ready()
    {
        Ready();
    }

    void ios_update(bool viewSizeChanged)
    {
        Update(viewSizeChanged);
    }

    void ios_destroy()
    {
        Destroy();
    }
}
In the actual source file, these are mutually exclusive: the callbacks go inside #if defined(PLATFORM_IOS), and desktop main() goes in the #else branch. Both paths use the same Ready(), Update() and Destroy() functions.
Why extern "C"?
My game code is C++, but the iOS side of this raylib backend expects symbols named:
ios_ready
ios_update
ios_destroy
C++ normally performs name mangling, which changes the symbol names stored in the compiled binary.
Wrapping the callbacks with:
extern "C"
{
    // ...
}
gives those functions C linkage, so the native raylib-iOS code can find the names it expects.
The .cpp extension tells Xcode to compile the entry point as C++; extern "C" preserves the callback names expected by the native backend.
Getting My C++ File Into the Xcode Project
I didn't want to manually edit the generated Xcode project every time I deleted Targets/.
The whole point was to be able to do this:
rm -rf Targets/
./scripts/ios.sh
and get back to a working project.
So I added scripts/prepare_ios.py.
The first job of that script is simple: copy my real source file into the raylib-iOS Xcode project.
source_main = ROOT / "src/main.cpp"
ios_main = xcode_dir / "main.cpp"

ios_main.write_text(source_main.read_text())
The stock project references main.c, though, so copying the file isn't enough.
I also update project.pbxproj:
pbxproj = pbxproj.replace(
    "main.c in Sources",
    "main.cpp in Sources"
)

pbxproj = pbxproj.replace(
    "/* main.c */",
    "/* main.cpp */"
)

pbxproj = pbxproj.replace(
    "lastKnownFileType = sourcecode.c.c; path = main.c;",
    "lastKnownFileType = sourcecode.cpp.cpp; path = main.cpp;"
)
Now Xcode compiles my C++ entry point instead of the original C example.
At this point I had the basic architecture I wanted:
My C++ code
     │
     ├── Desktop ──> CMake ──> raylib
     │
     └── iOS ──────> raylib-iOS Xcode project
                           │
                           └── UIKit / iOS
The C++ entry point now compiled. Launching the app exposed a separate lifecycle problem.
Fixing the UIScene Lifecycle for Xcode 27
The project compiled, but when I tried to launch it on my iPhone I got:
Application failed to launch:
UIScene life cycle is required for apps built with this SDK.
I was building with Xcode 27 and the iOS 27 SDK. Apple documents the requirement: starting with iOS 27, apps built with the latest SDK must use the scene-based lifecycle to launch. This is an SDK and runtime requirement, not a limitation of C++.
The release/5.5 version of raylib-iOS I was using still created its window through AppDelegate. That older lifecycle wasn't enough for the SDK I was building against.
I needed to move that setup into a SceneDelegate.
Adding a SceneDelegate
I didn't want to maintain my own permanent copy of raylib-iOS just for this change.
Instead, I made prepare_ios.py patch:
Targets/raylib-ios/src/platforms/rcore_ios.c
after cloning raylib-iOS.
The patch adds a SceneDelegate:
@interface SceneDelegate : UIResponder <UIWindowSceneDelegate>

@property(strong, nonatomic) UIWindow* window;
@property(strong, nonatomic) CADisplayLink* displayLink;

@end
The window creation then happens when the scene connects:
- (void)scene:(UIScene*)scene
        willConnectToSession:(UISceneSession*)session
                   options:(UISceneConnectionOptions*)connectionOptions
{
    if (![scene isKindOfClass:[UIWindowScene class]]) return;

    self.window =
        [[UIWindow alloc] initWithWindowScene:(UIWindowScene*)scene];

    self.window.frame =
        ((UIWindowScene*)scene).coordinateSpace.bounds;

    self.window.rootViewController =
        [[GameViewController alloc] init];

    [self.window makeKeyAndVisible];

    [self.window layoutIfNeeded];
    [self.window.rootViewController.view layoutIfNeeded];

    ios_ready();

    self.displayLink =
        [CADisplayLink
            displayLinkWithTarget:self.window.rootViewController
            selector:@selector(update)];

    [self.displayLink
        addToRunLoop:[NSRunLoop mainRunLoop]
        forMode:NSRunLoopCommonModes];
}
ios_ready() reaches my C++ Ready() function and initializes raylib. CADisplayLink schedules the frame updates.
Instead of this desktop loop:
while (!WindowShouldClose())
{
    Update(false);
}
iOS controls when the frame update happens.
The display link calls the raylib view controller's update method, which eventually reaches:
ios_update(bool viewSizeChanged)
and therefore my C++ Update() function.
Handling App Focus
I also moved the focus handling into the scene lifecycle:
- (void)sceneWillResignActive:(UIScene*)scene
{
    CORE.Window.flags |= FLAG_WINDOW_UNFOCUSED;
}

- (void)sceneDidBecomeActive:(UIScene*)scene
{
    CORE.Window.flags &= ~FLAG_WINDOW_UNFOCUSED;
}
And when the scene disconnects, I stop the display link:
- (void)sceneDidDisconnect:(UIScene*)scene
{
    [self.displayLink invalidate];
    self.displayLink = nil;
}
These callbacks update raylib's focus flag and release the display link on disconnection. They are not a complete pause, save or scene-reconnection system; a larger game still needs to handle those cases.
Updating AppDelegate
Once SceneDelegate owns the window, AppDelegate doesn't need to create it anymore.
Its launch function becomes:
- (BOOL)application:(UIApplication*)application
        didFinishLaunchingWithOptions:(NSDictionary*)launchOptions
{
    return YES;
}
It also provides the scene configuration:
- (UISceneConfiguration*)application:(UIApplication*)application
        configurationForConnectingSceneSession:(UISceneSession*)connectingSceneSession
                                      options:(UISceneConnectionOptions*)options
{
    UISceneConfiguration* configuration =
        [[UISceneConfiguration alloc]
            initWithName:@"Default Configuration"
            sessionRole:connectingSceneSession.role];

    configuration.delegateClass = [SceneDelegate class];

    return configuration;
}
The scene delegate also needed a matching configuration in the app bundle.
The Info.plist Problem
I initially let Xcode generate the application's Info.plist.
The generated scene manifest wasn't what I needed. When I inspected the built application, I was getting a scene configuration that didn't match the lifecycle I had just added.
Eventually I compared it with the configuration I had working in Kasino and switched the example to an explicit Info.plist.
The important part is:
<key>UIApplicationSceneManifest</key>
<dict>
    <key>UIApplicationSupportsMultipleScenes</key>
    <false/>

    <key>UISceneConfigurations</key>
    <dict>
        <key>UIWindowSceneSessionRoleApplication</key>
        <array>
            <dict>
                <key>UISceneConfigurationName</key>
                <string>Default Configuration</string>

                <key>UISceneDelegateClassName</key>
                <string>SceneDelegate</string>
            </dict>
        </array>
    </dict>
</dict>
Now the application explicitly says that its default scene uses:
SceneDelegate
I also disable Xcode's generated plist and point the project at the one stored in my repository.
prepare_ios.py changes:
GENERATE_INFOPLIST_FILE = YES;
to:
GENERATE_INFOPLIST_FILE = NO;
and adds:
INFOPLIST_FILE = "../../../../ios/Info.plist";
My build script also passes the settings explicitly:
GENERATE_INFOPLIST_FILE=NO \
INFOPLIST_FILE="$IOS_PLIST"
After building, I checked the Info.plist inside the actual .app instead of assuming Xcode had generated what I expected.
Check the plist inside the built .app, since that is the configuration iOS reads.
With both pieces in place:
rcore_ios.c
    │
    └── SceneDelegate
            │
            ├── creates UIWindow
            ├── calls ios_ready()
            └── drives updates with CADisplayLink

Info.plist
    │
    └── Default Configuration
            │
            └── SceneDelegate
the application finally launched correctly.
And because all of these changes are done by prepare_ios.py, I don't have to keep a manually modified copy of raylib-iOS in the repository.
I can delete the entire generated environment:
rm -rf Targets/
and recreate it.
The build script puts those preparation steps in one place.
Automating the iOS Build
The final example has a simple command for preparing and building the iPhone version:
./scripts/ios.sh
On the first run, the script clones the release/5.5 branch:
git clone \
    --depth 1 \
    --branch release/5.5 \
    https://github.com/ghera/raylib-iOS.git \
    "$RAYLIB_IOS_DIR"
Then it runs the preparation script:
python3 "$ROOT_DIR/scripts/prepare_ios.py"
At this point prepare_ios.py has three jobs:
1. Replace main.c with my C++ main.cpp
2. Patch the backend for the UIScene lifecycle
3. Configure the project to use my Info.plist
Finally, ios.sh builds the Xcode project:
xcodebuild \
    -project "$XCODE_PROJECT" \
    -scheme raylib \
    -configuration Debug \
    -sdk iphoneos \
    -destination 'generic/platform=iOS' \
    -derivedDataPath "$BUILD_DIR" \
    CODE_SIGNING_ALLOWED=NO \
    GENERATE_INFOPLIST_FILE=NO \
    INFOPLIST_FILE="$IOS_PLIST" \
    build
I'm intentionally using:
CODE_SIGNING_ALLOWED=NO
here.
This script's job is to prove that the iOS application can compile successfully. Signing is separate because it depends on your Apple developer account, team and devices.
A successful build produces:
Targets/iOS/DerivedData/Build/Products/Debug-iphoneos/raylib.app
The generated project can be recreated, but this is not a pinned, reproducible build: release/5.5 is a branch and can change. Pin a tested commit if you need the same upstream source every time. The patch also depends on the current backend and Xcode project text.
I tested it by deleting Targets/ completely:
rm -rf Targets/
./scripts/ios.sh
and rebuilding from a fresh copy of raylib-iOS.
The fresh build worked in my setup. Next I added a simulator script.
Running It in the iOS Simulator
Once the iPhone build was working, I wanted the example to have a faster development loop.
Opening Xcode, selecting a simulator and pressing Run every time works, but for a small example like this I wanted one command:
./scripts/ios-simulator.sh
The simulator script uses the same generated raylib-iOS project, but builds it with the simulator SDK instead:
xcodebuild \
    -project "$XCODE_PROJECT" \
    -scheme raylib \
    -configuration Debug \
    -sdk iphonesimulator \
    -destination "platform=iOS Simulator,id=$SIMULATOR_ID" \
    -derivedDataPath "$BUILD_DIR" \
    CODE_SIGNING_ALLOWED=NO \
    build
There are a couple of small details that made this script more useful than just hardcoding one simulator.
Finding an Available iPhone
Simulator IDs are different from machine to machine, so something like this wouldn't make sense in a public repository:
4D30B15A-B35B-4A80-A396-D9CD023AA855
That's just the ID of one of my simulators.
Instead, I get the available devices from simctl:
xcrun simctl list devices available --json
and use a small Python snippet to find the available iPhones:
devices = [
    device
    for runtime in data["devices"].values()
    for device in runtime
    if device.get("isAvailable", False)
    and device.get("name", "").startswith("iPhone")
]
If an iPhone Simulator is already running, I prefer that one:
devices.sort(key=lambda d: d.get("state") != "Booted")
Otherwise the script takes the first available iPhone and boots it.
That means I can already have an iPhone Simulator open and the script will just use it.
Finding Simulator with Multiple Xcode Installations
I also ran into a small issue here because I was using:
Xcode-beta.app
instead of the normal Xcode.app.
Originally I tried:
open -a Simulator
but that couldn't find the application in my setup.
Since xcode-select already tells us which Xcode installation we're using, the script looks for Simulator relative to that developer directory instead:
DEVELOPER_DIR="$(xcode-select -p)"
Then it checks the possible Simulator or DeviceHub locations:
for candidate in "$DEVELOPER_DIR/Applications/Simulator.app" \
                 "$DEVELOPER_DIR/../Applications/Simulator.app" \
                 "$DEVELOPER_DIR/Applications/DeviceHub.app" \
                 "$DEVELOPER_DIR/../Applications/DeviceHub.app"; do

    if [ -d "$candidate" ]; then
        SIMULATOR_APP="$candidate"
        break
    fi
done
Then:
open "$SIMULATOR_APP"
This also means the script follows the Xcode version selected with:
xcode-select -p
rather than assuming Xcode is installed at one specific path.
Boot, Install and Launch
Once the simulator has been selected, I wait for it to finish booting:
xcrun simctl bootstatus "$SIMULATOR_ID" -b
After the simulator build finishes, the resulting application is:
Targets/iOS/Simulator/Build/Products/Debug-iphonesimulator/raylib.app
I install it with:
xcrun simctl install "$SIMULATOR_ID" "$APP_PATH"
and launch it with:
xcrun simctl launch \
    "$SIMULATOR_ID" \
    "com.example.raylib"
So the complete development loop becomes:
./scripts/ios-simulator.sh
The first run can take a while: if the generated project is missing, this script calls ios.sh, which also builds the device target, before building for the simulator. Later runs still clear the simulator build directory.
After editing src/main.cpp, run the preparation script again. The simulator script only prepares a missing project, so otherwise it can build an old copy of your source:
python3 scripts/prepare_ios.py
./scripts/ios-simulator.sh
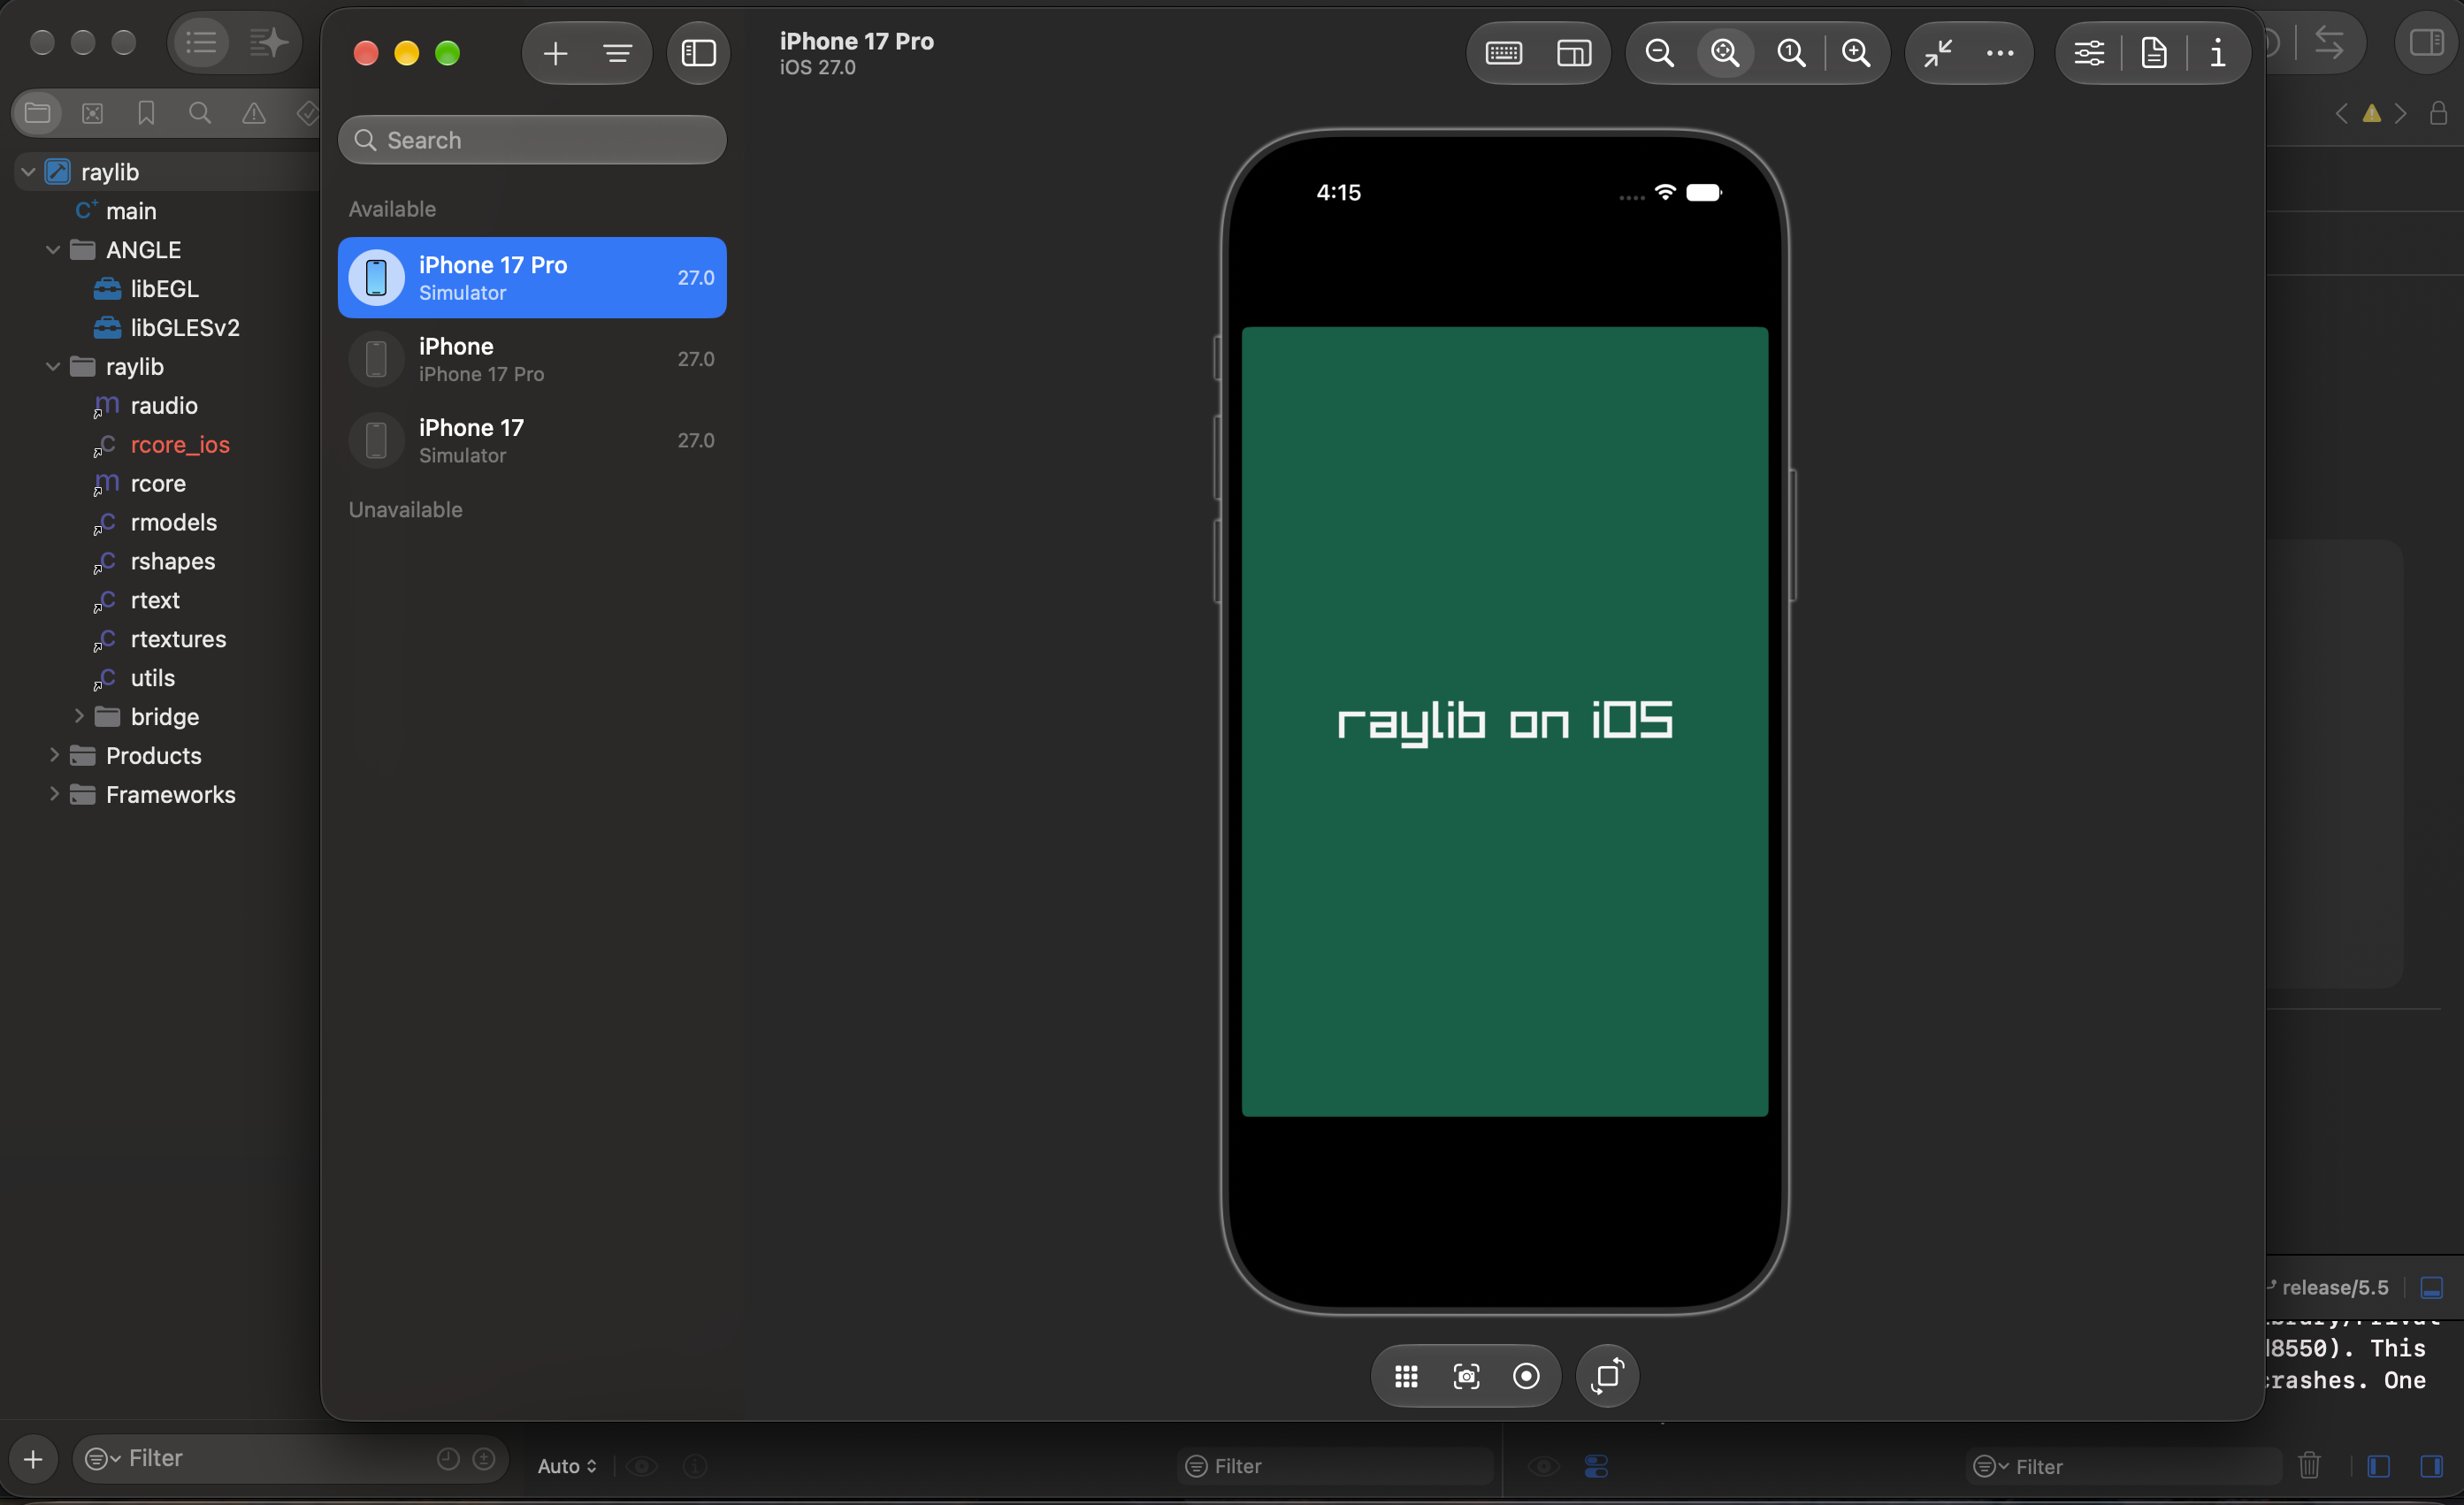
The test application displays:
raylib on iOS
on a green background.
That's enough to prove that C++ is compiling, raylib is rendering, the iOS lifecycle is running and the simulator build is actually installable.
Running on a Physical iPhone
The simulator is useful for development, but I also wanted to make sure this wasn't something that only worked there.
For a real device, I first prepare the project:
./scripts/ios.sh
Then open the generated Xcode project:
open Targets/raylib-ios/projects/Xcode26/raylib.xcodeproj
From Xcode, select the raylib target and configure Signing & Capabilities with your Apple Development Team.
Then select the connected iPhone and press Run.
The signing part isn't automated in this example because it depends on your Apple developer account and provisioning setup.
I tested the same generated project and C++ code on a physical iPhone. The unsigned .app from ios.sh cannot be installed directly on the phone; Xcode must sign the device build. Use a unique bundle identifier if signing rejects com.example.raylib, and enable Developer Mode on the phone if prompted.
The Final Project
After stripping all of the Kasino-specific code out, the example ended up being pretty small:
raylib-ios-example/
├── assets/
│   └── .empty
├── ios/
│   └── Info.plist
├── scripts/
│   ├── ios.sh
│   ├── ios-simulator.sh
│   └── prepare_ios.py
├── src/
│   └── main.cpp
├── CMakeLists.txt
├── .gitignore
└── README.md
There is intentionally no Xcode project committed to the repository.
The Xcode project comes from raylib-iOS and lives under:
Targets/
which is ignored by Git.
I maintain the C++ code, plist and scripts, and regenerate the iOS project when needed.
Trying It Yourself
You need macOS with full Xcode, the iOS platform support and an installed iPhone Simulator runtime, plus Git and Python 3. The desktop commands also require CMake 3.20 or newer.
Clone the example:
git clone https://github.com/nesmy/raylib-ios-example.git
cd raylib-ios-example
Make sure Xcode is selected:
xcode-select -p
xcodebuild -version
If you're using the normal Xcode installation:
sudo xcode-select --switch /Applications/Xcode.app/Contents/Developer
Or, if you're using Xcode Beta like I was:
sudo xcode-select --switch /Applications/Xcode-beta.app/Contents/Developer
Then the quickest test is:
./scripts/ios-simulator.sh
The first run will download raylib-iOS and prepare the generated Xcode project.
If you only want to create the iPhone build:
./scripts/ios.sh
And the normal desktop version still uses CMake:
cmake -S . -B build
cmake --build build
Back to Kasino
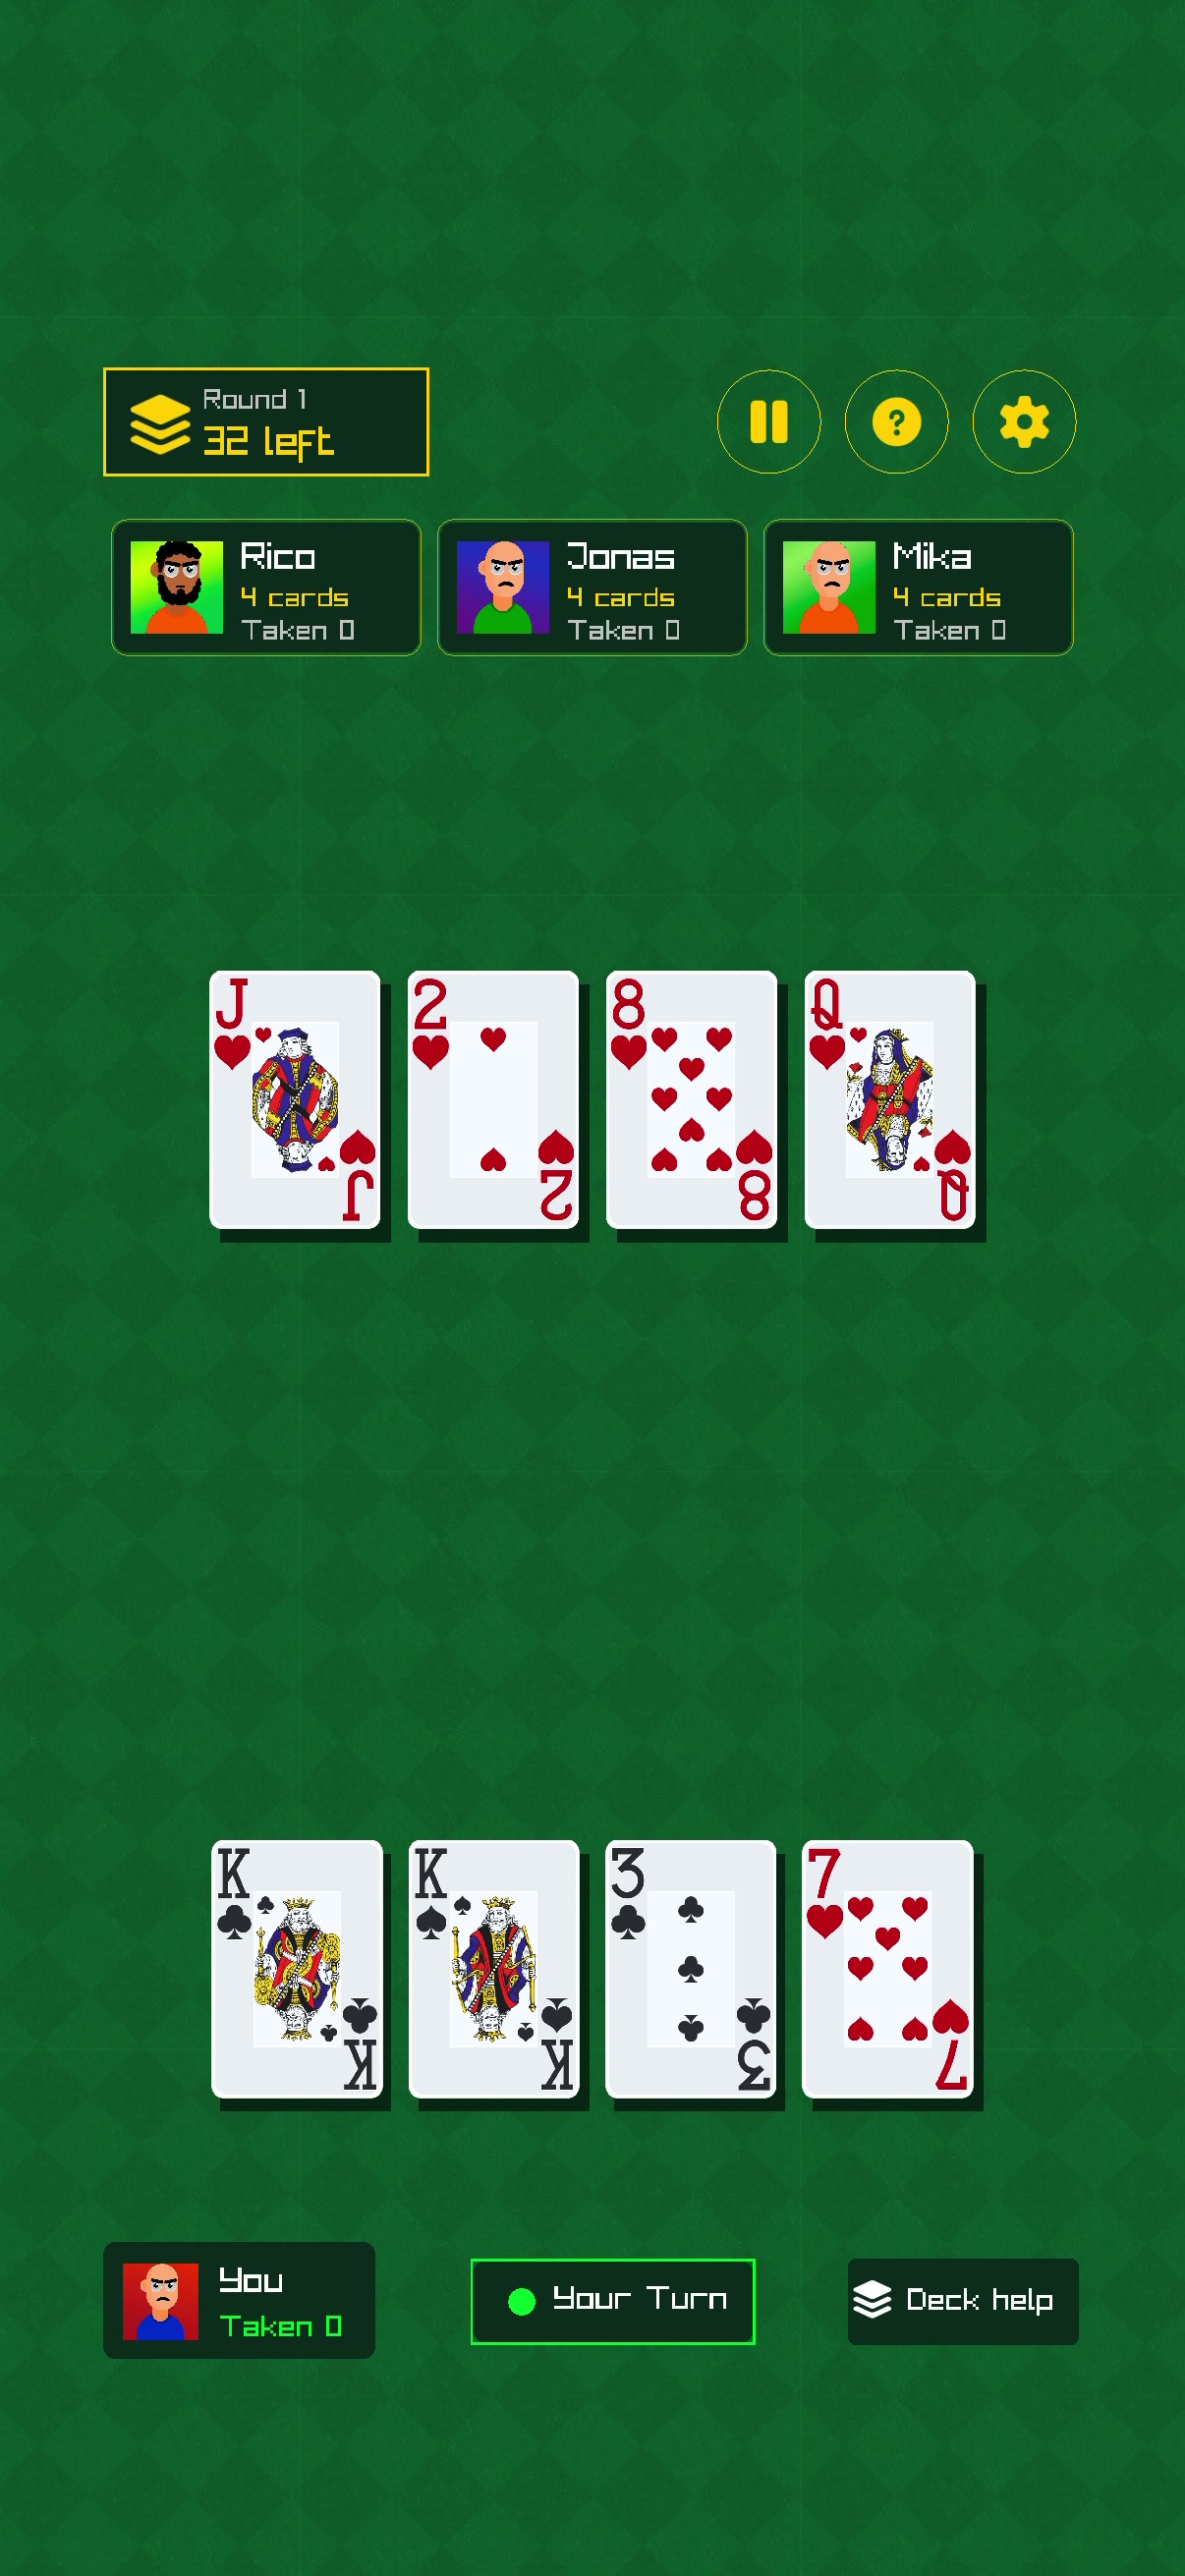
Kasino is why I needed this setup in the first place. The green-screen example isolates the build and rendering path; the real game brings back the card table, opponents and touch controls.
The two problems were separate: my normal raylib 5.5 build selected the desktop backend, and the iOS fork needed a scene lifecycle update for the SDK I was using. Using the fork's Xcode project and scripting that patch let me keep the game in C++.
There is still mobile work to do on Kasino. This example covers getting raylib rendering on iOS; it doesn't cover shipping a full game, managing its assets or submitting it to the App Store.
The code is in nesmy/raylib-ios-example. For the game behind it, see Kasino Devlog #4.